As I stated in the last post, a shower pan can be a tricky thing to construct properly and a flawed shower pan can have some very expensive repair costs associated with it! So I’m going to walk you through my current repair project so you can see what goes into a properly constructed shower pan and more over, shower floor reconstruction.
I love to do shower repairs. It’s never a straight forward process, each one is a little different depending on the extent of the damage, how the shower was originally constructed (materials, age of construction ect.) and what materials you plan on finishing it with. I’m just going to jump right in and start with the first step of this current shower repair:
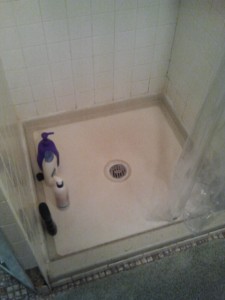
 This shower floor has been leaking for some time and fortunately it is built in the basement and has only caused minimal damage to the wall adjoining it. So the fix is an easy one. Tear out the existing shower floor and built a new shower pan to tile on. Oh, wait… the tricky part, these tiles are older and replacements are not available in any stores so we have to do our best to tear out the shower floor and preserve the tiles and existing walls best we can! I already know that I’ll be tearing out the first two rows of tiles so I have enough room to properly build the shower pan. I’m planning on replacing the shower floor with a 2″x2″ white ceramic tile and match the floor tile with a 4″x6″ cove base for the first row of tiles and replacing the second row with the tiles I salvage from the demolition.
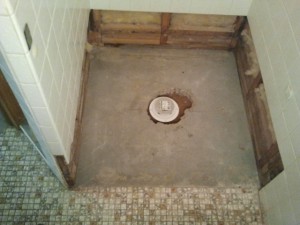
Here you have a clean demo of the shower floor right down to the concrete basement floor. We took the opportunity to replace the shower drain since we’ve gone this far, we might as well make it all new!
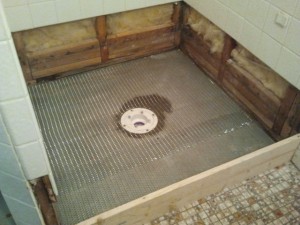
 The first step in building a shower pan is the “pre-pan”. It is a concrete foundation that is sloped from the walls of the shower toward the drain. Above that is where the plastic liner will be installed so we need to get the slope just right! First I lay down 2.5ga. metal lath over the whole shower area. This is so that the concrete pre-pan has something to adhere to and keep it together since it will only be 1/2″ thick at it’s thickest and slope down to nothing at the point of the drain. It really is a thin slab of concrete and the metal lath does a great job keeping it in one piece.
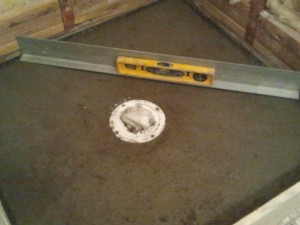
It’s kind of hard to see the slope I made in this picture to the right but if you look closely you can see a gap towards the middle of the pre-pan where I have the straight edge. You don’t want a heavy slope or it will make it uncomfortable to stand in when you’re showering! You just need a minimum of 1/4″ slant per foot. Since the longest distance I have from the drain to the wall is just under 2 feet, I’m going to make my slant from 1/2″ to drain. First, I’ll level my concrete around the perimeter of the shower at 1/2″ then simply fill in the remainder of the shower with concrete and slope it with my trowel toward the drain. I say simply, but it can take some practice and a little patients. Every step of the shower pan is important to get just right or we’ll end up with a product that doesn’t drain properly and water may seep into places we don’t want it causing reoccurring problems!
So there you have your shower demo, and pre-pan construction. In the next post I’ll show you how to install the shower pan liner, curb, and finish coat!


No comments yet.